How to Hide and Show a Tab Based on Field Values on the Account in Dynamics CRM
In this article I will cover how to hide and show a tab based on field values on the account. You may find this useful when you would like to show or hide several fields based on the type of account you are looking at.
In this example I added:
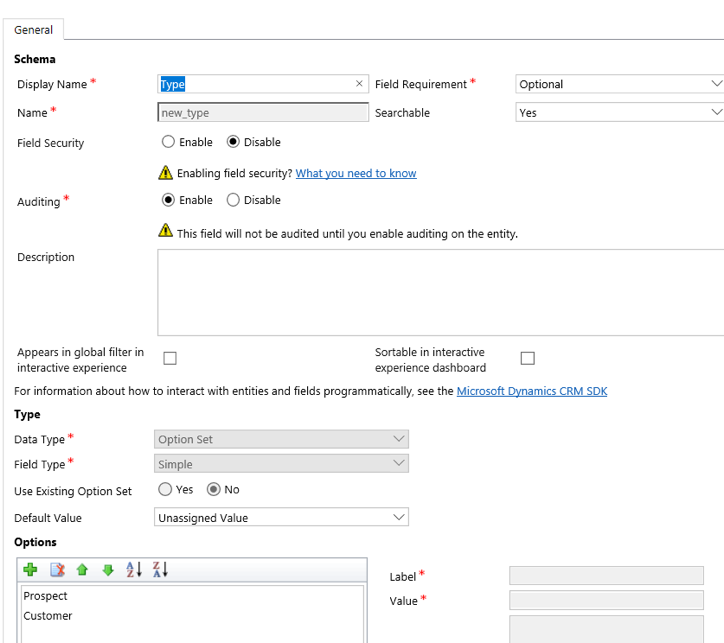
- A new field to the Account entity to the main account form with two selection values
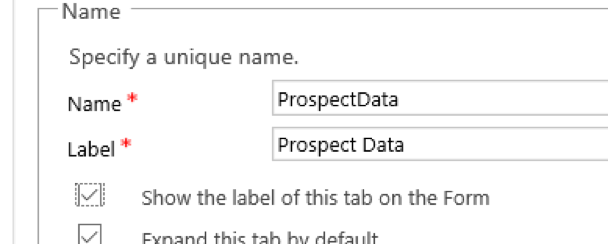
- Two custom tabs
- A dummy field to each tab (but you can add as many fields as needed)
New Field
New Tabs Information
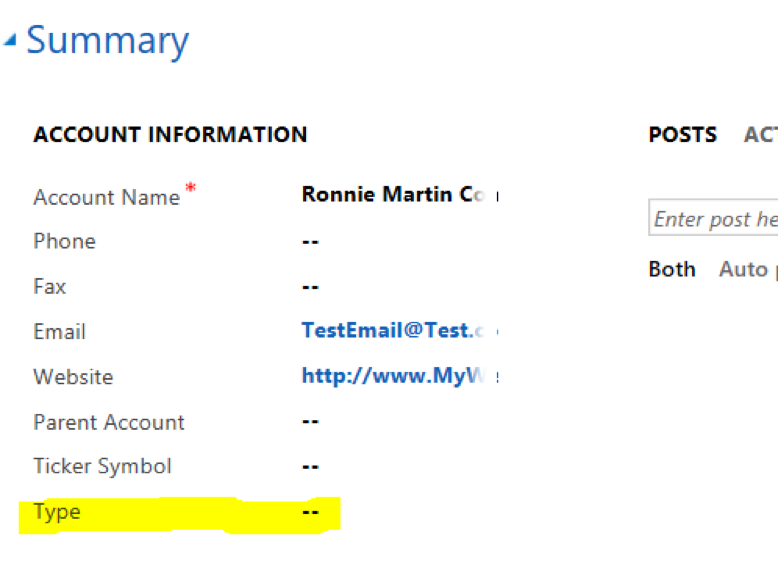
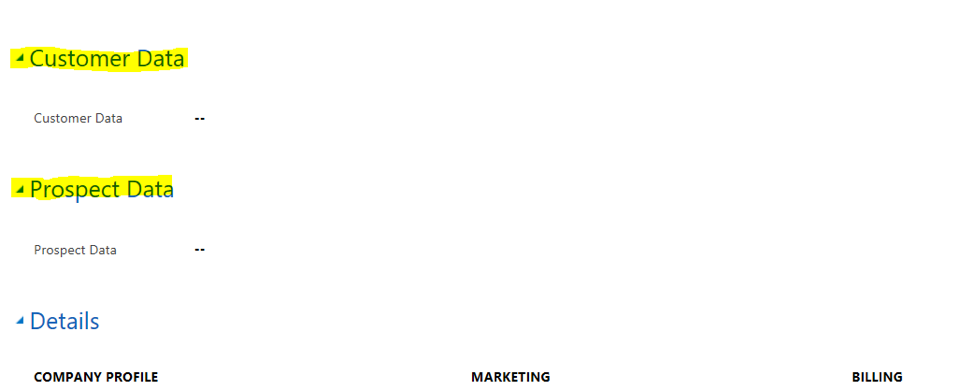
Here are the screenshots of my account form after these changes.
Next you need to create a java file that will hide or show the tab based on the value in the Type field. You can create a new text file and change the file extension to ‘.js’. I used the file name ‘Hide and Show Account Tabs.js’.
Open the file in a text editor and add the following code:
function showHideAccountTabs()
{
accountType = Xrm.Page.getAttribute(“new_type”);
if (typeof (accountType) != “undefined” && accountType.getValue() != null)
{
if(accountType.getText()==”Customer”)
{
Xrm.Page.ui.tabs.get(“ProspectData”).setVisible(false);
Xrm.Page.ui.tabs.get(“CustomerData”).setVisible(true);
}
else if (accountType.getText()==”Prospect”)
{
Xrm.Page.ui.tabs.get(“ProspectData”).setVisible(true);
Xrm.Page.ui.tabs.get(“CustomerData”).setVisible(false);
}
}
}
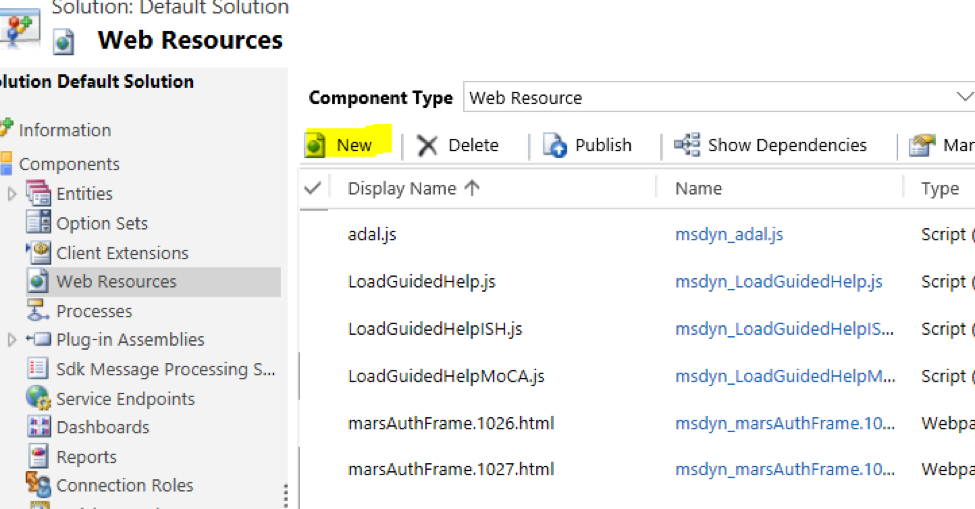
Save your code file and add the file as a Web Resource to your Dynamics CRM. This can be done by going to Settings -> Customizations. Select Web Resource then click on New.
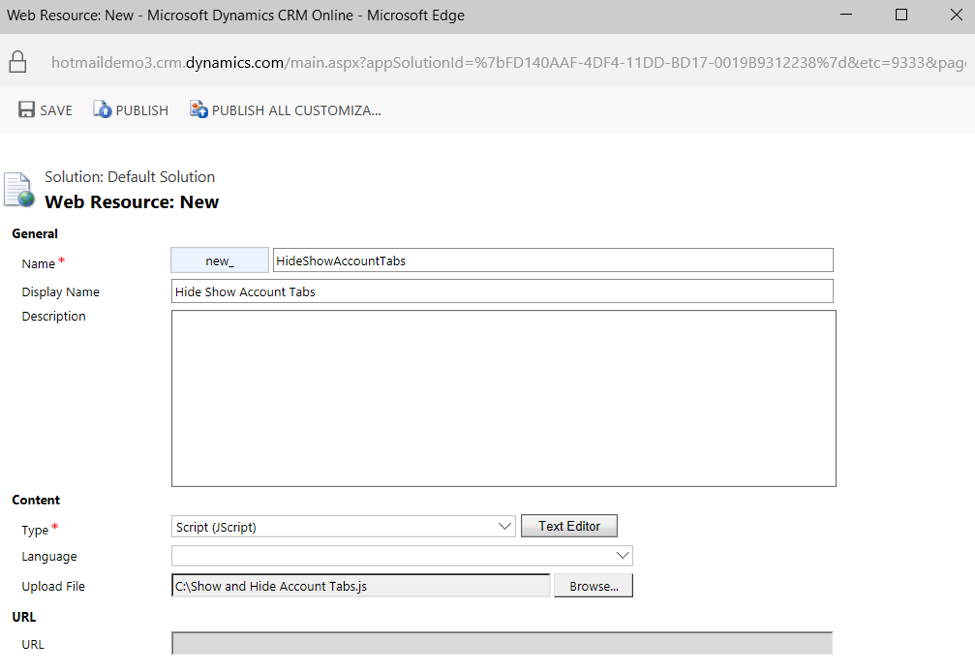
Fill out the information as shown below and select your script file. Click on Save. Click on Publish. Close the window.
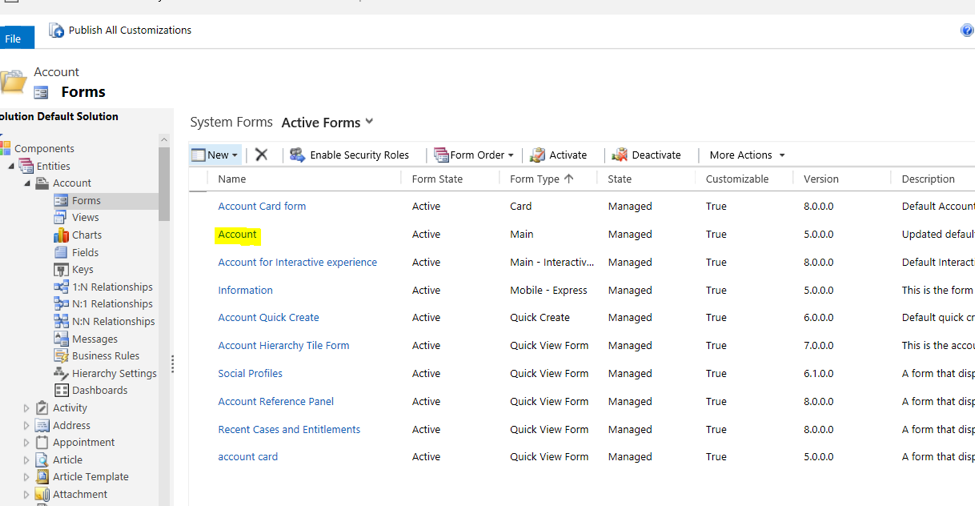
Next you need to add this Web Resource to the main form and configure it to run when the form loads and when the Type field is changed. In the customization area expand Entities. Expand Account. Click on form and open your main account form with the Type field.
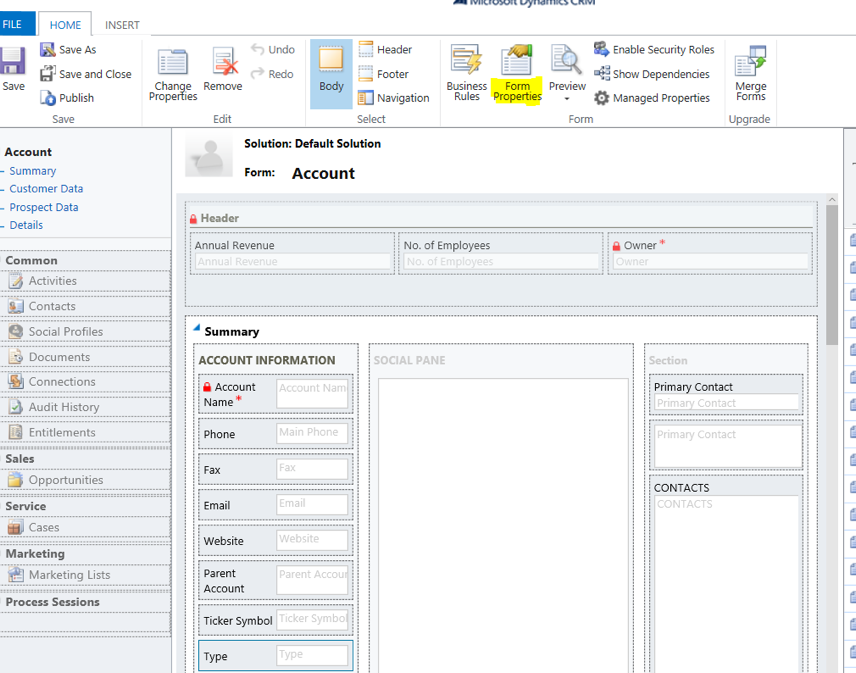
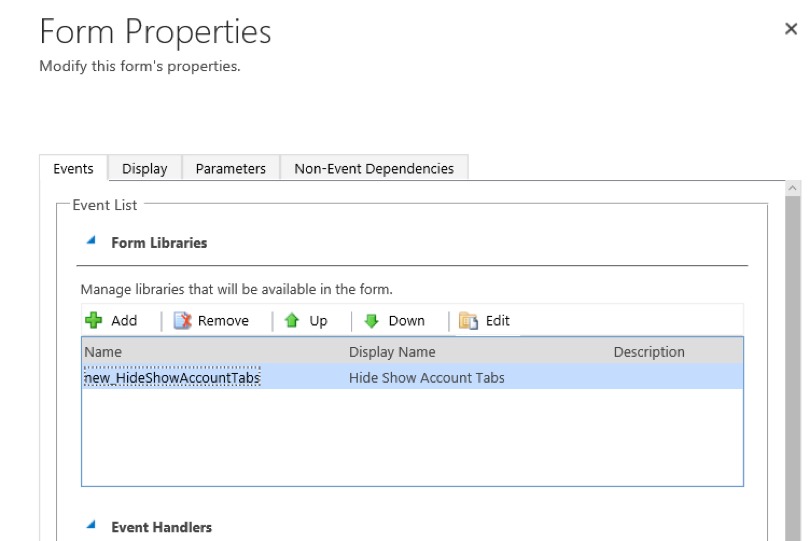
Click on Form Properties.
In the Form Library section add your script file.
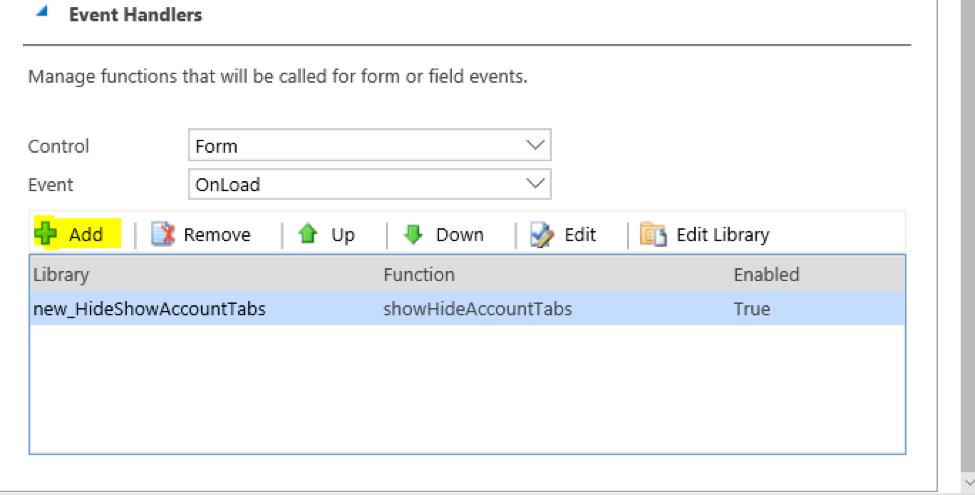
In the Event Handler area, confirm that Control is set to Form and Event is set to OnLoad and click on Add.
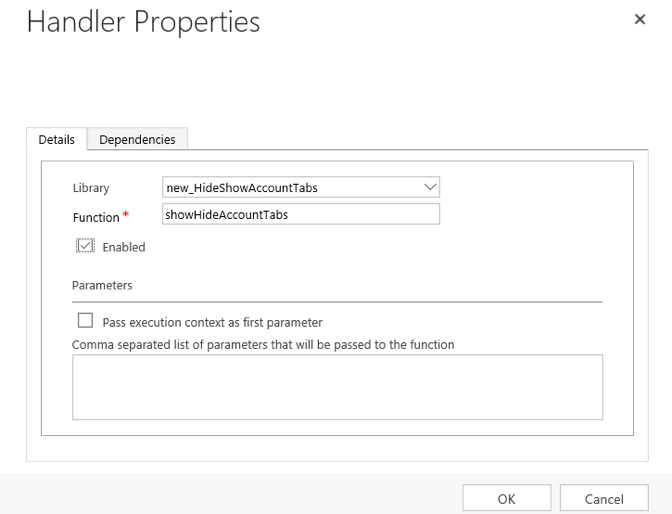
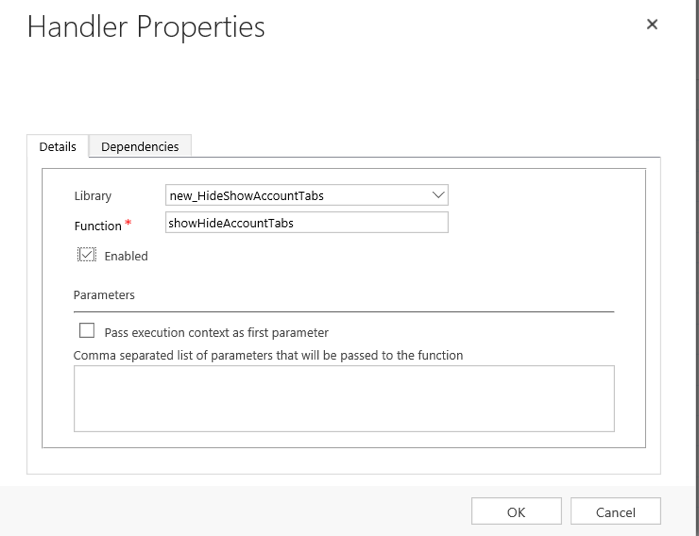
Select your script file and type the name of your function from the script file. Click Ok. Click Ok on the Form Properties window.
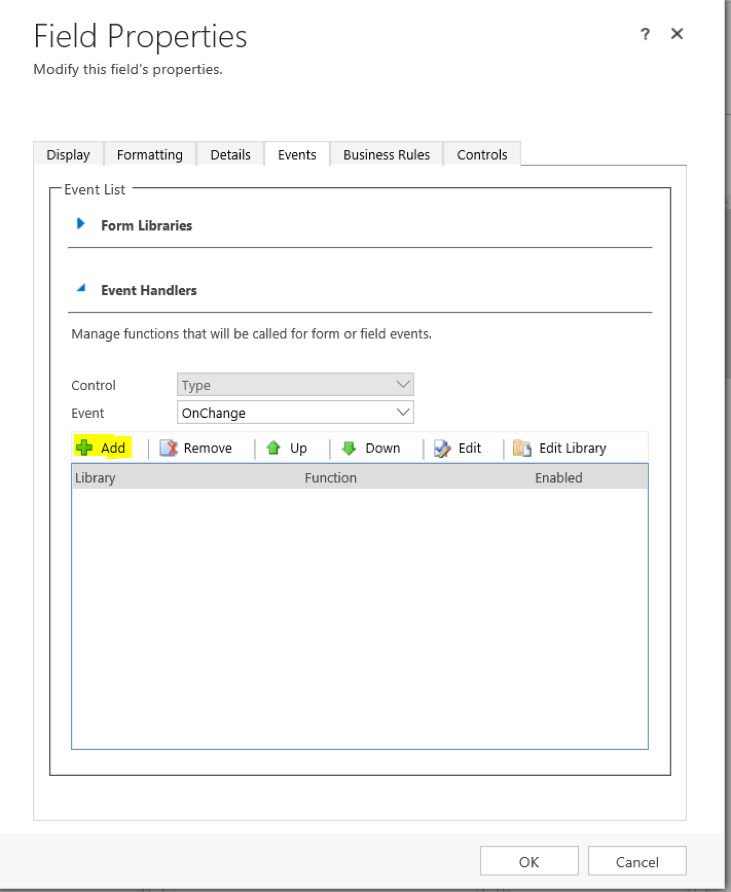
Now select the Type field on your account form and click on Change Properties then click on the Events tab at the top. Confirm that the Event is set to OnChange and the Control is name of your field. Click on Add in the Event Handlers section.
Select your script file and type in the function name from the script file. Click on Ok. Click Ok on the Field Properties window.
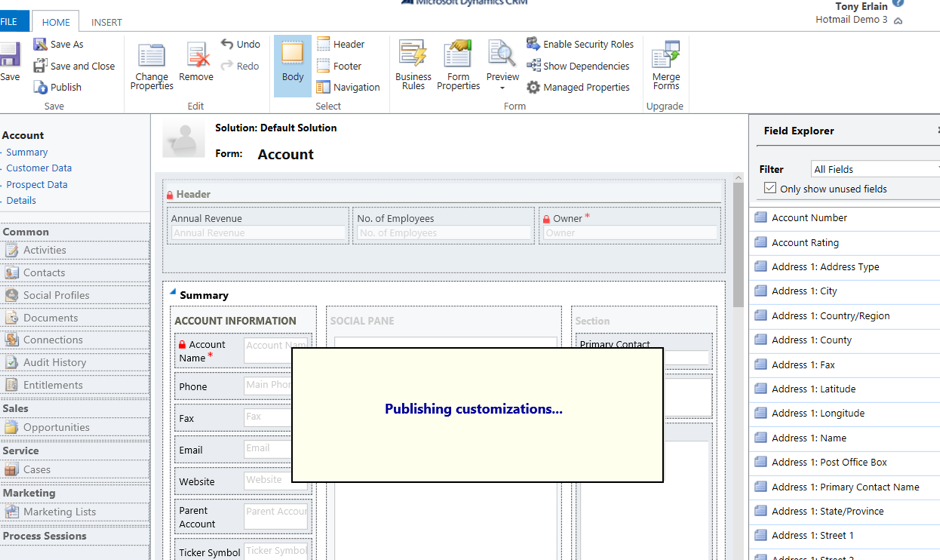
On the account form click on Save. Click on Publish. Close the account form window. Close the customization window.
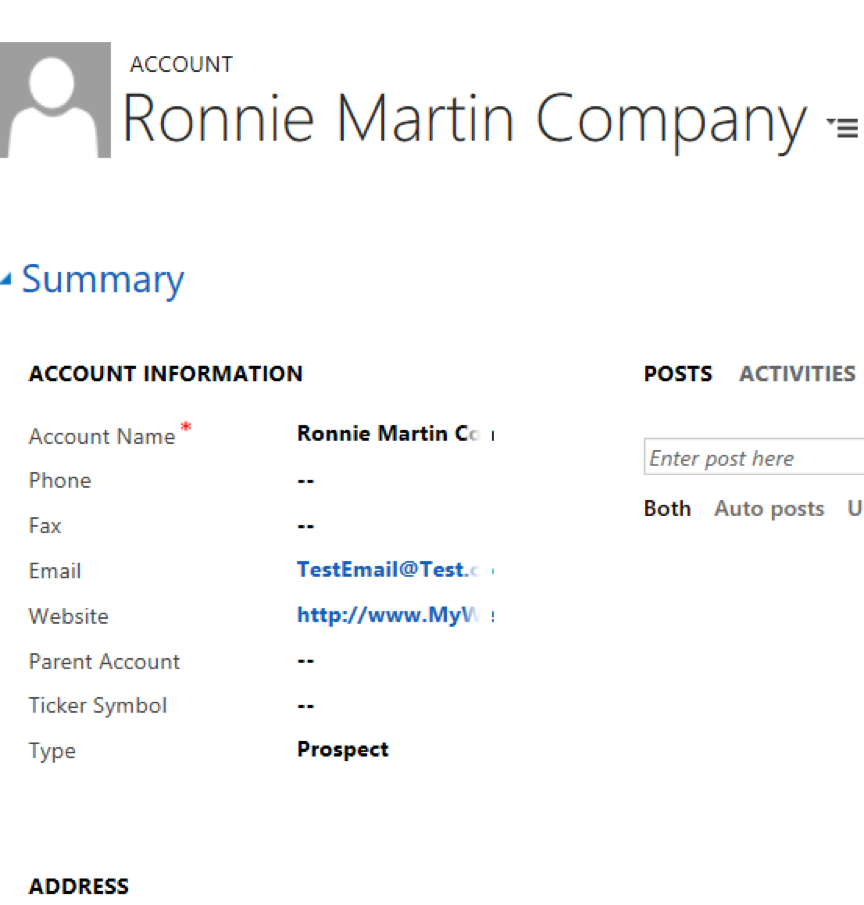
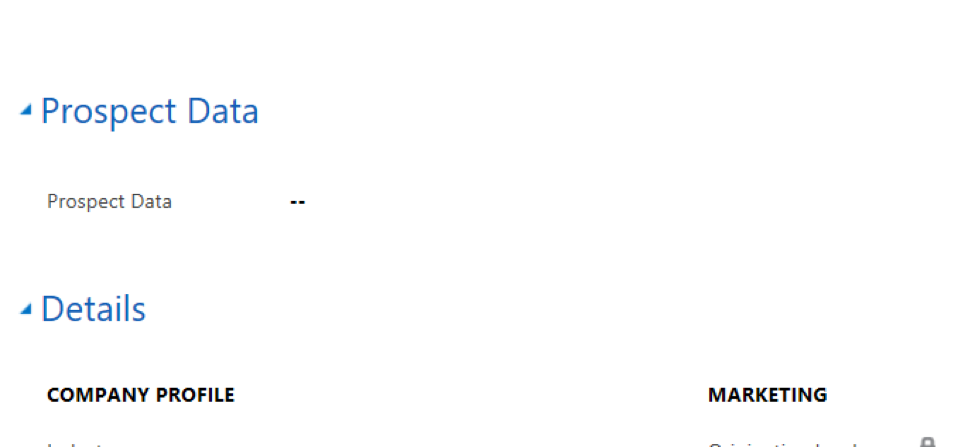
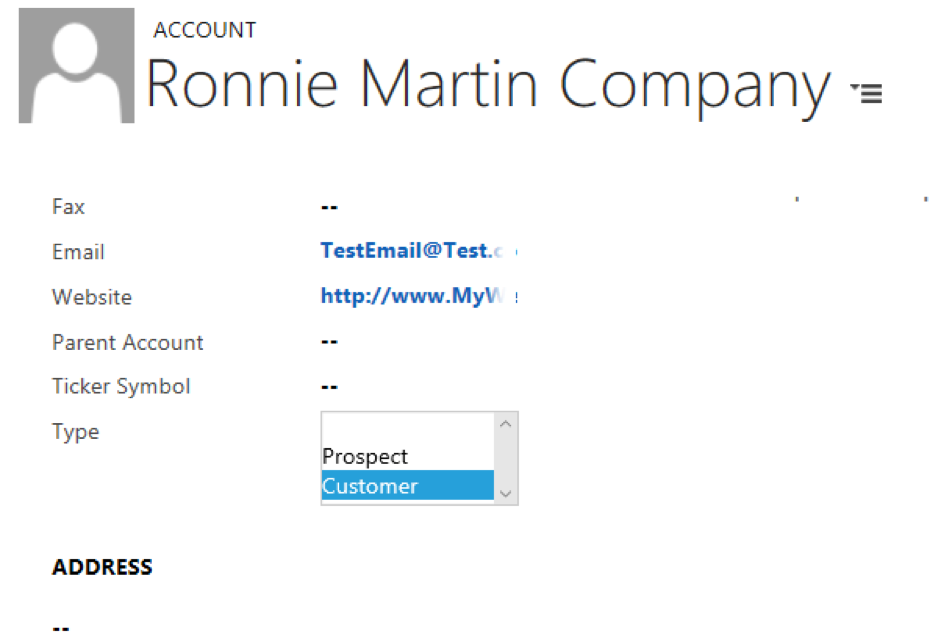
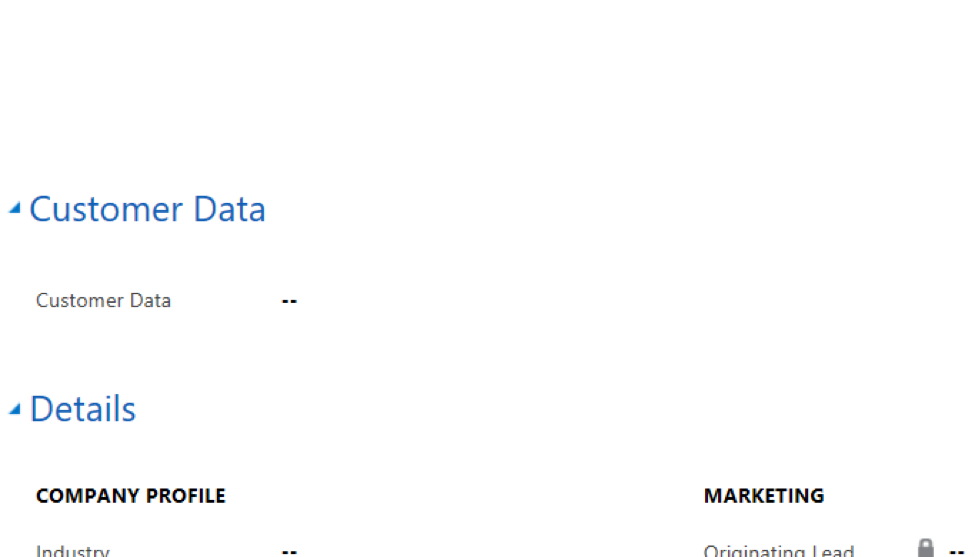
Go to any account in Dynamics CRM to test the changes. Notice as you change the account Type field the appropriate tab is visible and the other tab is hidden.
Prospect
Customer
Click here to learn more about OnTrack Support and how QuantaCRM can help you get the most out of Microsoft Dynamics 365 for Sales!
Was this post helpful? Enjoyable? Do you have feedback or additional questions? Let us know in the comments, or contact us directly. We’re here to help!



Thanks for this post.
If I could add one small note, the JavaScript line:
Type = Xrm.Page.getAttribute(“new_type”);
probably should be:
accountType = Xrm.Page.getAttribute(“new_type”);