A data map works as the back-bone of the Import process by mapping source file and columns to their corresponding target record types and fields in Dynamics CRM.
One question that I had when first using Dynamics CRM was how to create a new data map.
I could export the import templates, and use those to import data, but I couldn’t quite understand how to create a new data map.
My problem was that I was trying to modify the existing import templates, and I was using Excel files rather than CSV or XML.
So, to create a new data map:
- Create an Excel file with some data – accounts, contacts, etc., whatever you’d like to import. But then save this as a CSV file.
- NOTE: The first row should be a header row which designates the data in each column.
- For a contact import, it could be something as simple as this:

- In Dynamics CRM, navigate to Settings, Data Management, Imports
-
- Click on Import Data at top
- Select the CSV file
- Next make sure the delimiter settings look good and that you have “First row contains column headings” checked.
- Click Next and Select – “Default (Automatic Mapping)” as your Data Map
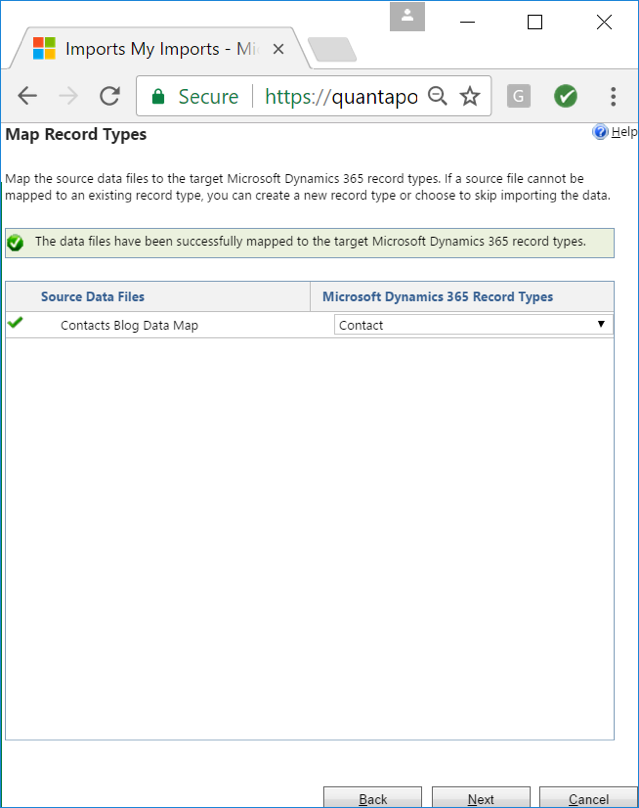
- Click Next and Select Contact (or your proper Record Type) for Record Type

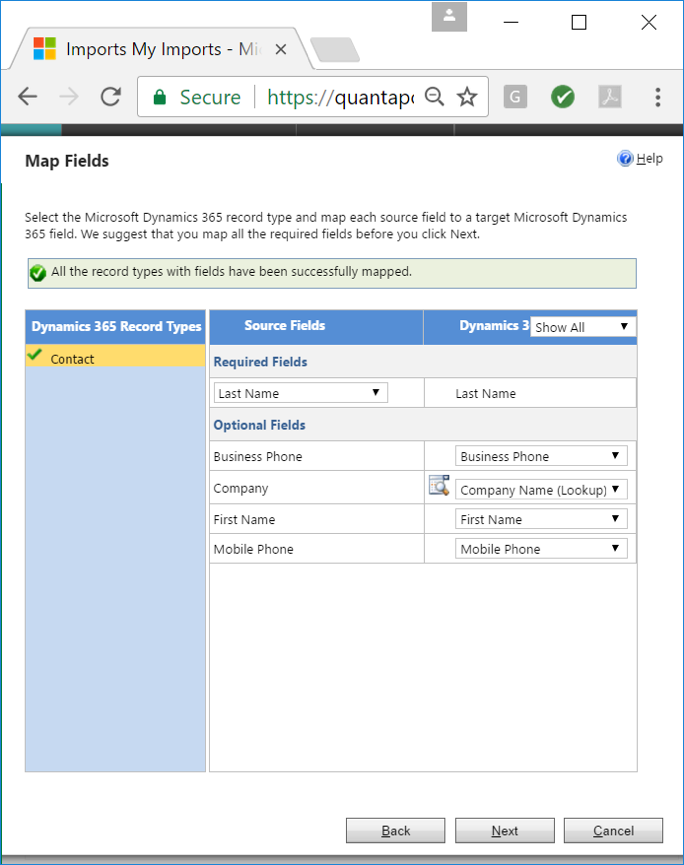
- Select Next and map your fields

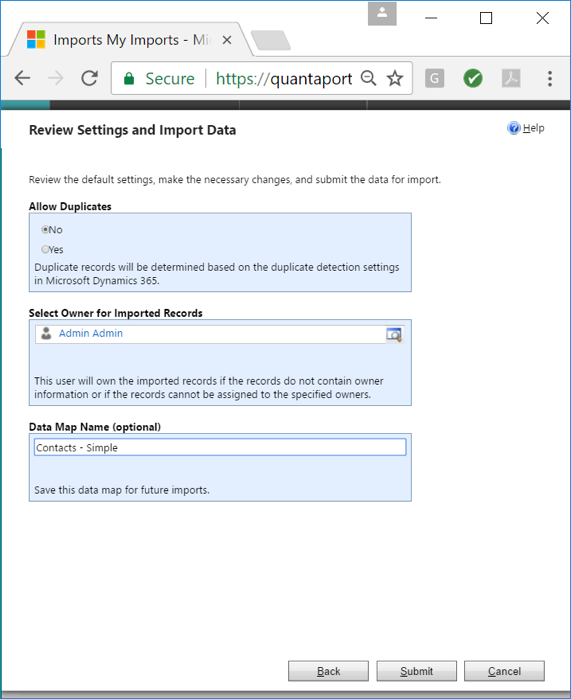
- Click Next – If this is a Data Map you would like to use again, give the Data Map a Name

- Click Submit
- Click on Finish, or Imports link to make sure the import is successfully (you can refresh at the top right as needed)
-
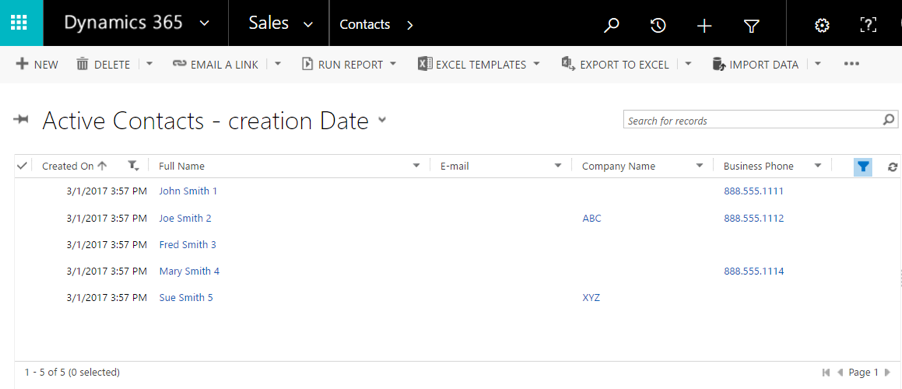
- If everything is successful, the contacts are now in CRM:

Level up your CRM skills with QuantaCRM
For more tech tips, how-to guides, and instructional videos, check out our CRM Support archive!
Click here to learn more about OnTrack Support and how QuantaCRM can help you get the most out of Microsoft Dynamics 365 for Sales!
Was this post helpful? Enjoyable? Do you have feedback or additional questions? Let us know in the comments, or contact us directly. We’re here to help!

